Pages

Showing posts with label DIY. Show all posts

Saturday, September 1, 2012

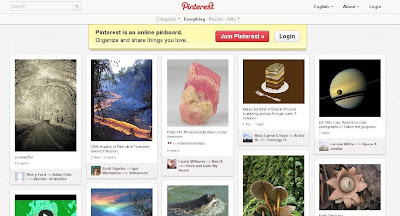
Pinterest: The Useful Tool

... as opposed to Pinterest: The Pointless Time Suck

I recognize that it's passé to say "I love Pinterest." There's probably some newer, cooler social media-linked image filing system out there. But you're reading the words of someone who still has an AOL account* and still uses blogger**.  Trust me, I'm actually a fairly with-it person. Did you hear that song by Carly Rae Jepsen? Well, I did. That's how with-it I am.


You didn't know that you needed
to see this baby otter until you
found Pinterest.
I love Pinterest, and not just because one of my friends has a pinboard entitled "Wouldn't Kick Him Out of Bed For Eating Crackers" that is filled with pics of hot actors. No, I love it because I think it is actually a useful (and green!) way of organizing images and ideas.

For example, let's think about the old way of organizing ideas, recipes, etc. - the way my mom did back in the early 80's. My mom was a lot like a modern mom blogger before blogs - she baked, sewed, knitted, etc. Of course, it wasn't a trend then. It was just something you did. And she had a variety of paper-based systems for organizing her ideas for projects:


  • a recipe box filled with recipe cards, most of which were hand-written. A few were recipes torn from magazines and then glued onto cards. Some others were torn from magazines and crammed into the box.
  • a binder where she kept pages she'd ripped out of magazines for decorating or fashion ideas she wanted to remember
  • stacks of magazines or catalogs with folded down pages, meant to be perused later
You might be thinking... that sounds awfully familiar. It does to me, because I adopted a very similar "system," although mine consisted of a lot of folders.

But with Pinterest, you don't have to waste any paper (or space in your house.)  There's no need to print out articles or recipes that you want to remember, or to keep a folder of bookmarks on your browser. There's just the simplicity of hitting that little button on the tool bar with a red P in a circle.

Now, you might be thinking, this is nice, but is it REALLY useful? It's not just another way for American consumerist society to take up more corners in our lives?

Take that, Gyllenhaal.
Of course it is. The internet begat easier and easier ways to fill one's home with more stuff, while also begetting a movement of connected (mostly female) bloggers who are sharing the ways that they live more sustainably and creatively. So does Pinterest beget people who pin slightly alarming pictures of Jake Gyllenhaal naked in a bathtub (no, I'm not going to link to it. Do your own dirty work), while also resulting in folks who use it for organizing their work or life.

Here are some of the ways I actually use Pinterest to make life easier:
  • To make stuff.  If you've been on Pinterest for five seconds, no doubt you've seen some pretty amazing recipes for things like "Black Bottomed Mini Caramel Cheesecake Bites" and "Fig and Goat Cheese Pizza" (totally re-pinning that). It's a lot like having subscriptions to a schizophrenic collection of cooking magazines, some dedicated to desserts that will cause instant heart attacks, others to eating healthy. And don't let's get started on the craft ideas! I have boards dedicated to crafts and to food. You're probably wondering, then, if this is useful or just wish-fulfillment -- am I simply creating the idea of a crafty life? Well, no. I've actually made a skirt that I saw on Pinterest, tried recipes, etc. Will I make it all? No. But I also won't make all of the recipes in my Cooking Light subscription, or in the knitting magazines I've bought, and no trees died for my pinboard.
  • To share ideas. Because Pinterest allows you to share pinboards with friends, it can be a really cool way to create together. For example, I lead a Girl Scout troop with three other volunteers. We used to send each other random emails with ideas for crafts and cookouts. The emails just got lost, the ideas forgotten. Now, however, we have a shared pinboard and so before a campout, say, we can go to our board and look at the ideas we have shared to create our plan. My friend Melanie, who really likes home decoration, created shared boards with me to help me with ideas for my new house. Without those pinboards, I'd probably have an empty home right now.
  • For inspiration. I like to save pictures. I'm a little bit of an image hoarder. I have a whole file drawer filled with images I've cut out of magazines. Why? What do I do with them? Well, when I'm writing a story, I often create a kind of "mood board" for the story (until moving and sharing the home pinboards with Melanie, I probably wouldn't have known to call them mood boards) It's MUCH more efficient to create these mood boards through pinning - no flipping through magazines or digging through files.
  • For lookin' cool. Or... cool-ish? I have a little bit of trouble putting together outfits and figuring out how to do my hair. Lately, however, I've gotten a lot of comments like, "How do you do your hair like that? That's so cool." The answers: a) bobby pins; b) Pinterest. Pinterest is full of easy to replicate, real-life fashion ideas. I know that sounds trivial, but most of the fashion world is not meant to be re-created by actual humans.
  • To find pictures of Daniel Craig. Because, after all, are you going to kick him outta bed for eating crackers?

* The God's honest truth.
** Someone younger than me at work has declared that "Blogs are dead." I'll run and tell my blog right now.

Tuesday, February 14, 2012

Light Green Retro: DIY Valentine's - It's Not Too Late


Thought I'd share a post from the Ghost of Light Green Past. I basically expressed my thoughts on Valentine's Day in the following post, so it seemed weird to write a new one when I believe all the same things. Enjoy!


And to all my readers (gosh, I think there may be close to 100 of you!), on this day of love, I'm sending much love to you!


So, Valentine's Day is not my favorite holiday, being, as it is, a commercial-fest of consumerism, blah-blah ... you know all the arguments about how the greeting card companies make us feel bad if we're not part of the celebration in order to amp up our holiday spending. I felt a little discouraged seeing the last-minute shoppers cruising Kroger, trying to find something - FAST - for that special someone. They were even selling plates of cheese pre-cut into hearts. I might find myself questioning someone who doesn't have time to cut heart-shaped cheese themselves (there's a joke in there somewhere, but I just can't get it.)

Luckily, the tough economy, according to this NPR story, has led more people to make their own holiday gifts and cards. That seems more meaningful than the plate of heart-shaped brie - unless your sweetie really loves cheese. Even though it's late in the day, there's still time to DIY for your loved ones. Here are a few ideas (and at the end of the post, find an alternative to Valentine's Day)


I absolutely love these Anatomically-correct Hearts from cheekymagpie.com. Just click the link for the template.


I traced the template onto craft paper and cut it out. Then you just fold it in half and you get a lovely, 3-dimensional heart. All-in-all, it takes about 5 minutes and looks gorgeous.


An inspiring quotation makes a nice addition to your card. You can find some great quotations about love here, at Wisdom Quotes. These are great because they aren't the same ol', same ol'. Gotta love any site that includes Albert Einstein in its page on love.


Now, I haven't tried Nigella Lawson's Valentine cupcakes, but I listened to her describe them on NPR yesterday, and I definitely mean to. Make them for a sweetie with a sweettooth. The chocolate cherry ones sound especially tasty, and quick to make. I also like the way Nigella describes how the competitive world of boarding school produced in her a "lofty detachment" toward the holiday. You go, Nigella!


Mix-tapes are a traditional gift from one disturbed teen to another. For you music lovers, check out the iTunes store. The "Essentials - Crazy Love" mix contains all the stories of whacked out romance you can handle, including "Stan" by Eminem, "Ben" by Michael Jackson, and "Under My Thumb" by the Rolling Stones. Get it for someone you stalk.


Finally, for those of you singletons who are perfectly content to be single, check out International Quirkyalone Day. This holiday, to quote the website, is: "a do-it-yourself celebration of romance, friendship, and independent spirit. It's a celebration of all kinds of love: romantic, platonic, familial, and yes, self-love. International Quirkyalone Day is not anti-Valentine's Day. It's NOT a pity party for single people. It's an alternative--a feel-good alternative to the marketing barrage of Valentine's Day and an antidote to the silicone version of love presented in shows such as Hooking Up and The Bachelor."


And who can't find the love for that?

Thursday, January 26, 2012

February Lady Sweater

I just finished a major knitting project - it's a gift to my sister. The pattern is the "February Lady Sweater" which you can get for free!  It looks complicated, but actually it was fairly simple, since it's knit as all one piece.


Here's a detail of the lacework:


Good thing I finished in time, so my sister can wear her "February Lady" sweater in February.

Wednesday, January 18, 2012

Re-purposed Style Part 2: DIY

The other day I featured some of the cool vintage and thrifted decor my sister has around her house.

Today I wanted to show off some of the items that she has DIYed or altered. She saves money and saves the planet by creating her own decorations from items that she has re-purposed.

The top picture is just a framed postcard with a mat made out of craft paper.


My sister created these decorative plates herself. You could use plates from a thrift store or dollar store.

She simply made color photocopies (using her printer) of images from an old children's book that we had, The Caretakers of Wonder. That way, she didn't have to destroy our heirloom.

She then cut out and decoupaged the images on the plates. The alphabet letters spell out ...

DREAM


This one is a favorite of mine; I actually created the artwork years ago. I've been trying to get it back from my sister for a long time, but somehow she manages to keep hold of it.

I freehanded the outline of the tree onto a sheet of paper - it's been a long time but I think I copied an image from a catalogue. Then I looked through magazines to find images that had brown or green; I snipped tiny pieces from them. I glued the pieces onto the outline like a mosaic.

My sister used craft paper for a mat. Having a nice supply of craft paper around always makes DIY easier.

I wish that I had my sister's taste and crafty skills!

Sunday, January 15, 2012

Re-Purposed Style

My sister has an amazing eye for finding treasures among the junk at thrift and antique stores. Not only does she manage to make everything she touches look adorable, her focus on decorating with vintage items is better for the planet and the pocket book.

Here are a few of her best finds:


This is a dress form on a vintage plant stand. My sister just wrapped it in some cool fabric.


Repurposed style is all about going with the flow: you can't PLAN to find a vintage bird cage this cute. You just have to be ready to pounce when you see it.


I just love this unique religious statue. My sister keeps it in her doorway. It perfectly matches the coloring of the rental house where she is now living.

It's easy to see something like this and think: gee, that's sort of cool, but it's also weird.

You have to have an eye for the possibilities and a sense of whimsy.


These antique skates are part of my sister's holiday decor.

Aren't they handsome?


I wish I had a better picture of this one.

The painting at the bottom is vintage. My sister's had it for years and it just looks cool.

The one on top is a painting that my sister did of her beagle. I love the way the folk art style of the vintage painting matches the simple artwork my sister did. It just proves you don't have to be an artist to make art.

Coming up: I'm going to feature some of my sister's crafty decor that showcases recycled and repurposed items.


Do you have favorite vintage or thrifted pieces in your home?

Friday, December 9, 2011

Holiday DIY - Yarn Wreaths


I've been making these yarn wreaths this holiday season, and I have to say, I've loved the way they've turned out.

Plus - they're a great way to repurpose random yarn from your stash that you're not sure what to do with (you know the balls of yarn that aretoo big to discard, but aren't big enough to make much of anything?), as well as random craft supplies and ribbon.

If you want to make your own yarn wreaths (or the felt flowers), you can click here for a tutorial... but I bet that some of you crafty types canfigure out how it's done just from the picture.

Now, when I was teaching, one of my rules when we were doing any kind of project was: "simpler is better." You see, when kids are faced with baubles and beads, they want to use ALL of them.

Of course, "simpler is better" is not true all the time, but in crafting, it quite often is. Just Google Image search "yarn wreaths." You'll find lots of inspiration. You'll also find some wreaths made by people who never had a teacher who told them:"simpler is better." When designing your wreath, remember this simple axiom.

One way to green this craft: If you can find old wreaths at a thrift store, you could take off the decorations and use the form as a base for your wreath. My thrift store didn't have
anything appropriate, so I had to buy the wreath forms, which are very ungreen. Also, some craft stores (though not mine!) have straw wreath forms, that will be better for the environment than floral foam. If you try this craft, hopefully you can find greener craft supplies than I did!

Sunday, October 23, 2011

DIY: Hallooooween Owl Treat Bag Tutorial


I'll tell you a secret. I don't really like Halloween.

Why not? Halloween has a bunch of things that I like: chocolate, taking on new identities, wigs, scary stories. Yet, when these things are added together to become the holiday we call Halloween, I start getting annoyed.

I think it's because much of the lore of Halloween has been overturned by the American desire to drink too much and coerce women into dressing like sluts ("But you can win a thousand dollars at PJ McDrinky's Pub if you come as the sluttiest medical professional!")

However, I love Dia de los Muertos, the Mexican Day of the Dead. It's a celebration that holds a lot of the mystery of the druidic Samhain, which was then co-opted by Catholicism and brought to the new world by Spain, which then blended with the indigenous holidays. Rather than simply being a cash cow for the makers of uber-short plastic skirts and high-fructose corn syrup, it's a day to remember the dead not only with sadness, but with joy.

Whew. That's a lot of ruminating to get to my point: when I went to a Halloween-themed brunch this weekend, I wanted to make some favors that had the beautiful colors and folk art feeling of Dia de los Muertos-inspired art. I know that seems kind of silly, but I think we should put care and a bit of ourselves into everything we create. Hence, I came up with the following treats:

I made my friends some little gifts in wrapping inspired by papel picado, the brightly-colored cut-paper art that adorns altars for Day of the Dead. And because I like owls, I used an owl motif. Here's how I did it, and how you can too:

You need:
  • Paper sacks - you could use regular grocery sacks; I used black ones from the craft store. This would be a great way to reuse any small paper sacks you have.
  • Astrobright cardstock - real papel picado is made of tissue paper or thin plastic, but you'll find tissue paper is really hard to manipulate. You could use regular construction paper, but I find the colors of Astrobright to be similar to those of authentic papel picado. (Thanks to my blog friend, Sara of Feeding the Soil, for providing me with paper when I couldn't find some - meaning I didn't have to buy more stuff for my project!)
  • an Xacto or craft knife
  • a glue stick
  • Optional: a skull sticker or stamp
Step 1: Create a template. I freehanded mine after looking at a whole bunch of pictures of owls. If you're not a big fan of the free hand method, just right click this picture and click "Copy Image." Then just paste it into a word document. You can make it as big or small as you want, then print it and cut it out.

Step 2: Trace your template onto the Astrobright cardstock.

Step 3: Using the craft knife, cut out the owl that you traced. You should put a cutting board under your work - and of course, be careful not to cut yourself. Make sure your knife is quite sharp, or you'll have lots of little random feathery bits of paper in the edges of your cuts.

Step 4: I gave my owls a skull eye. I had a stamp of a skeleton, and I stamped it onto black paper. Then I cut it out and glued it behind the eye of the owl.

Step 5: Glue the owl to your bag!

Then you're done - easy peasy. I used the bag for treats, but you could also cut through the bag, so that there are actual holes in the paper sack. Then you could stick a battery-powered tealight inside to create a luminaria.

Coming up: How to make gourmet Halloween candies to put inside your treat bag!

Saturday, September 3, 2011

Felted Friend

Before anyone in Portland "put a bird on it", owls were one of my favorite motifs. (I'm just cool and fashion-forward like that). When I saw a tutorial to make a needle felted owl, it looked so easy that I thought I would try it.

Needle felting is a craft where you take a lump of wool and poke it with a needle a whole bunch of times until it becomes a firm shape. Yep, that's pretty much it. My friend (and the blogger behind one girl one camera), Darci, had shown my mom and I the needle felting basics a few months ago, and when I saw the tools for sale at Michael's, I knew that I was ready to give it a whirl.


These are the things you need:

- Wool roving (it's a clump of wool and comes in lots of different colors)

- A big needle

- Something to set the wool on when you poke I used that comb thing that you see in the picture. It's called a felting mat. You can see that I'm not exactly a stickler for a super-tidy work area.

Lots of people use a tool that has a bunch of needles inside it, so the poking goes faster, but they were all out of those at the craft store.

When it comes to crafting - or most things really - I'm not much for following directions. I read through the tutorial and then just thought I'd try it.

At right, you can see the little guy about half-way through. The hardest part was getting the head to be round. It ended up a little flat - I think I was poking too hard. The more you stab the wool with the needle, the fewer little fuzzies you get. I left a lot of fuzzies because it looked more owlish - plus I'm kind of lazy.

Here's the owlie with his owl friends!
This was definitely fun, EASY, and the initial outlay of money was small (about 15 bucks for the tools and each package of wool was around $2.50). I'm already thinking about how to make a needle felted squid.


Coming soon: The August Pop Culture Round-up

Friday, January 21, 2011

Bamboo U - Stitch Nation Yarn

Just like pandas, I'm a big fan of bamboo. It has many sustainability benefits -- it's relatively easy to grow, and involves fewer pesticides and fertilizers than other materials. Plus, it's a renewable resource. This week, I'm featuring some of my favorite bamboo products.


Knitting is a fabulous hobby. "Idle hands are the devil's work," is a favorite saying of grandmas, and knitting is like devil-repellent. However, it can be expensive, particularly if you want to use yarns made of more sustainable materials.

Stitch Nation Yarns, though, are affordable and 100% natural. Red Heart, the company that has spawned a million ugly acrylic sweaters, has partnered with Debbie Stoller (author of Stitch 'N' Bitch) to create a line of yarns made of natural materials.

I'm "wool-sensitive" (I break out in an attractive rash if wool touches my bare skin). This means that I often use yarns that are wool/acrylic blends. Most bamboo yarns are just too expensive. That's why Bamboo Ewe is so great. It is a bamboo/wool blend. It has a soft, silky sheen. And it's affordable and easy to find at common craft stores such as JoAnn Fabrics and Michael's. I love it when big companies get on the sustainability bandwagon. I don't care if they do it out of the goodness of their hearts or the fatness of their wallets. When sustainable products are available in the suburbs, I know we're going mainstream.

Sunday, December 19, 2010

It's Not Too Late to DIY!

Christmas may be less than a week away, but that doesn't mean you have to rush out and purchase the first Snuggie you see on the shelves. There's still time to create a lovely handmade gift that will be treasured over the years.

When making quick and easy DIY gifts, the key is to select quality materials and ingredients. A simple scarf made out of a single skein of hand-painted alpaca wool will be kept for years, while one made of the army-green acrylic remnants from the clearance bin may just find itself at the bottom of the closet (of course, your family members would never do that to something you made ... right?)

A few quick DIY options ...

Fleecy, Flannel Throw
(Est. time 1-2 hours)

Who doesn't love a snuggly throw to curl up with while they drink egg nog and watch and re-watch the stop-motion animated Christmas episode of Community? This quick and easy throw demands only rudimentary sewing skills (thank goodness, or I wouldn't be able to hack it).

Even I can hem... although not always in a straight line.


The pattern came from Design*Sponge (click here for directions). I modified it slightly by using a ribbon for the edging, rather than fringe. I believe Fringe belongs Thursday nights on Fox, not on my home decor (cymbal crash!).

Garter-Stitch Scarf
(Est. time 3-5 hours, depending upon how long you want the scarf to be)

One can never have too many scarves. Choose some cool yarn and start knitting while you listen to carols on your iPod. Bet the grandmother who taught you to knit would never have envisioned that.

Click here for some instructions from Light Green's past.

Spiced Cashews
(Est. time: Less than an hour)

To me, this recipe always says: "Christmas." Unfortunately, I don't have a very precise recipe -- I just make it up as I go along every year.

Garam Masala Cashews
(garam masala is an Indian spice blend you can find at most grocery stores)

Ingredients:
One can of whole cashews (about 10 oz)
2 Tbsp. butter, melted
1-2 tsp. garam masala
dash cinnamon

Pre-heat oven to 350 degrees. Mix the spices into the butter, then toss the cashews in the butter mixture to coat. Spread on a cookie sheet and bake for about 10 min. (Roasting nuts is a finicky business -- once you start to smell the delicious aroma, they're about to burn -- get them out of the oven ASAP).

Put into a nice jar with a ribbon around the lid if you're going to give as a gift.

Note: You can experiment with different spices of your choosing.


Sunday, October 31, 2010

DIY Dia de los Muertos Skirt

Let me just be frank.

(But I thought your name was Catfish, not Frank ... wocka wocka).

But seriously, I've never been a big fan of Halloween, or costumes. I don't love candy, and when you're an adult, Halloween is one of those drunk holidays that has a big "Stay off the Roads" sticker on it. However, I was recently inspired by one Miss Katy Perry to get a little festive this year without resorting to a disposable polyester one-size-fits-all monstrosity. (I mean, what could be less green that an outfit made of petroleum products that you wear once, save for awhile, and then chuck in the garbage?)

And here's what inspired me:

(Photo courtesy of sugarscape.com)

While I'm not a fan of boob bows, I really liked Katy's full skirt with the wacky print. I've always enjoyed clothing that has a bit of novelty to it -- T-shirts with strange screen print images, vintage dresses, etc. I decided that my wardrobe had been seriously lacking in whimsy lately.

I decided to make a skirt a bit like Katy's, with a crazy print. I settled on a Dia de lost Muertos print (Dia de los Muertos is the Mexican Day of the Dead, celebrated November 2) that is Halloweenish, but which would also look kinda punk rock if worn in a dive bar, or would turn a few heads when worn to the grocery store.

First I had to adapt a pattern:

Wily likes to lurk around while I'm sewing, waiting for a piece of pattern paper to fall within reach so he can destroy it.

Katy's skirt is a circle skirt (like a poodle skirt), which is ... a big circle. I have a copy of the book, Chic and Simple Sewing, by Christine Haynes, which had a circle skirt pattern (there are lots of online tutorials for making circle skirts if you want to make your own pattern). Unfortunately, the largest size was quite tiny, so I used it as a base to create my own. Also, since the print on my fabric was "directional" (i.e. it can only face one direction) and circle skirts are cut on a diagonal, I added some panels of solid purple. Leave it to me to make things more difficult, even though I'm a beginning sewer.

The actual sewing didn't take long, although I got off to several false starts with a misthreaded sewing machine.

I finally got the sewing machine threaded and I'm ready to sew.

Here's the finished skirt. .


And here I am, ready for Halloween.

I'll definitely wear this comfy skirt again, meaning it won't get dumped like many one-use-only Halloween items. Of course, there are lots of ungreen things about sewing (in particular, the production of cotton is hard on the environment and organic fabric is extremely expensive) but when we create our own clothing, we're much less likely to dispose of it quickly. We also take at least a few steps out of the manufacturing chain. And, of course, it's fun.

Thursday, September 30, 2010

Pinot's Palette

Last week a friend asked me: Do you take advantage of the city you live in? The answer is an unequivocal YES! Living in the city means that art, music, and great food are just a stone's throw away. An added benefit? Folks who live in cities tend to have smaller environmental footprints than their suburban or rural peers.

The other day, my friend Katie and I took advantage of our city's offerings by attending a class at Pinot's Palette -- a fun BYOB where you can drink a glass of wine and create your own masterpiece painting. Artistic talent is unnecessary -- they walk you through step by step!

Katie and I at our easels. Most of the equipment was reusable, including the glasses they provided for our wine.

Concentrating.

My work-in-progress. We used acrylic paints. While they are a petroleum product, they are generally thought to be safer on the environment than oils because they don't require paint thinner for clean-up.

Yay! They recycle. In Houston, this is never something you can take for granted, and I often find myself hauling home empty bottles and cans. It's great to find businesses that care.

Katie and I both had long, frustrating days, but as we painted away we relaxed. It's opportunities like this that make city-living the best.

Tuesday, September 14, 2010

Sweater Set

If I was dark green I would make my own clothes out of recycled paper bags and cotton that I harvested with my own two hands.

But I'm
light green, and so I work diligently to make the occasional apparel item and remind myself of the work that goes into a single garment.

Wow. I'm really happy about my new sweater.

I just finished a big knitting project, the "Wave and Dimple Kimono" from the Winter 2009 issue of Interweave Knits. I would love to say that I used organic yarn, or recycled yarn, or whatever, but honestly, those yarns are prohibitively expensive for big projects. I used Caron Country yarn, a merino blend.

Here it is, the Wave and Dimple Kimono. This was "deceptively hard" (as one of my yoga videos used to say) - i.e. people will think you're good at knitting if you do this pattern, but it's actually really easy.

Even thought it probably wasn't super-green, I loved this yarn. I'm wool-sensitive (that means I get the itchies if anyone says the word "sheep") but this yarn was soft, easy to knit up, and didn't require Zyrtec. That's all I could wish for.


The early stages of the project. Just to prove I actually made the damn sweater. That's my knee.

Friday, September 10, 2010

Homemade

I have been at a conference all week, eating lots of things that are both bad for me and don't taste delicious (ah, hotel buffets ...). At least the place had great coffee. Whenever I'm in this situation, both me and my guts start to long for homemade food, so I thought I'd share with you my recent adventure in homemade tortilla-making.

Flour tortillas are probably my favorite food. Often, I eat them straight out of the package. I like them with peanut butter and banana, or with black beans, or just avocado. Homemade tortillas are one of the best things about living in Texas, and none can ever be better than those made my students' mothers when I taught first and second grades.

Tortillas (even those made at most grocery stores) are usually filled with a lot of unpronounceable ingredients. I try to processed foods that only contain recognizable ingredients, preferably organically-produced, but I just can't give up tortillas. And here's the ingredient list of the most popular brand:

Ingredients: Enriched Bleached Wheat Flour (Wheat Flour, Niacin, Reduced Iron, Thiamine Mononitrate, Riboflavin, Folic Acid), Water, Vegetable Shortening (Interesterified Soybean Oil, Hydrogenated Soybean Oil and/or Palm Oil), contains 2% or less of each of the following: Salt, Leavening (Sodium Bicarbonate, Sodium Aluminum Sulfate, Corn Starch, Monocalcium Phosphate and/or Sodium Acid Pyrophosphate, Calcium Sulfate), Distilled Monoglycerides, Wheat Starch, Alpha Amylase, Tricalcium Phosphate, BHT, Cellulose Gum, Dough Conditioners (Fumaric Acid, Sodium Metabisulfite), Preservatives (Calcium Propionate, Sorbic Acid and/or Citric Acid).

Blech! Mama Earth says: Double blech! It's pretty amazing that a food that has only five ingredients when homemade has 13 (not even counting the ingredients in the ingredients) when processed, including conventional wheat and soybeans most-likely produced on factory farms.

So I decided to make my own tortillas. I chose a simple recipe from the internet (Click here to find it). It contains only five ingredients, one of which is water, and I can use my own flour and oil, produced organically.

First I had to knead the dough and let it rest, then form it into balls and let it rest again.


I was worried that rolling and cooking the tortillas would be hard to coordinate, but it worked perfectly. While one cooked, I rolled the next one.

And they turned out to have the uneven shape and grilled spots that the best homemade tortillas have.

These tortillas were delicious, but low in fat. Most of the moms of my students used lard or vegetable shortening. That would defeat the purpose of making my own tortillas, but I think next time I will add a bit more oil. We can't be too healthy!

Monday, June 14, 2010

Upcycled Lounge Pants

Since getting my sewing machine for Christmas, I've been beating around the bush when it comes to tackling actual wearable projects. After managing to make a small stuffed elephant that involved a great deal of precise work (done imprecisely) I decided I was ready.

I'd heard pyjama pants are the easiest clothing item to make and my copy of Sewing Green suggested they could be made with a reclaimed bed sheet.

I used to have some adorable purple chrysanthemum sheets that I haven't been using since the cat, in his kittenhood, clawed a few holes in the fitted sheet. However, I've saved them and thought they would make the perfect lounge pants.


I trimmed them with fabric from a quilter's quarter yard. Most of the sewing went smoothly, although some of the cuffs are not 100% straight and some of the hems are a bit bunchy. However, the pants are super-comfy, soft, and purple - my favorite color.